2020年7月11日土曜日

#Beach BABE (My Creative Scrapbook DT Work)


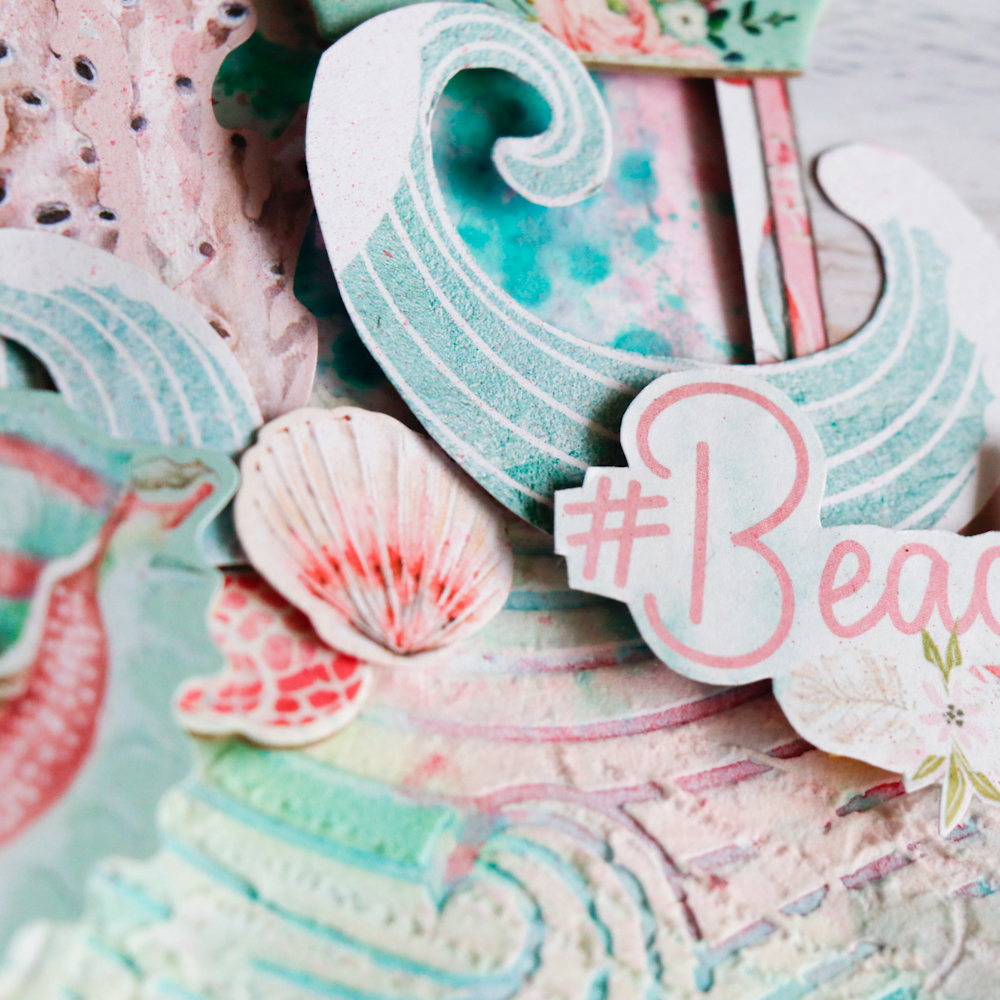
Hi! Today's layout is also made with the My Creative Scrapbook July Limited Edition Kit, but what is different is that I used a lot of mixed media. I used the wave stencil and stamp set that come with the kit.

For the waves I used modeling paste. I overlapped some of the patterns so it's not perfect, but I like the inperfection. After it had dried, I sprayed some blue, green and and a little pink paint.

こんにちは!今回のレイアウトも、My Creative Scrapbook のLEキットで作ったレイアウトですが、今回はいつもよりもたくさん、モデペや絵の具を使って着色をしました。キットに入っているステンシルとスタンプを使って背景づくり!

まず、波のステンシルとモデペを使いましたが、何度かステンシルを動かして波を足していったので、完璧な形ではありませんが、このランダムな感じが好きです!乾いてからブルー、グリーンとほんのちょっと、ピンクの絵の具をスプレーしました。


For the upper half, I used the stamp sep to create a pattern. What I did was after I spread gesso and dried it, I stamped the patterns with watercolor and sprayed water over it. 

上半分には、スタンプを使って模様付け。先にジェッソを塗って乾かしてから、水彩絵の具でスタンプをして水をしゅっしゅっとスプレーしました。


I layered the photo with several scraps of paper, and adhered to the background. Then I fussy cut waves from patterned paper, and embellished around the photo along with diecuts and chipboard. I layered foam underneath some of them to add dimention. 

写真にペーパーを何枚か重ね、背景に貼り付け。ペーパーから波をカットアウトし、ダイカットやチップボードと一緒に写真の周りに飾り付けました。いくつかにはフォームを貼って立体感を。


It was so fun creating this layout and I love all the texture.

ボコボコっとしたテクスチャーがお気に入り!楽しく作れました♪

You can get more information about this and the other kits at My Creative Scrapbook and you can find tons of inspiration in the blog too!

Thank you for visiting,  and have a scrappy day!

このキットと、その他のキットは My Creative Scrapbook で買えますよ~。ブログもどうぞ!
訪問して下さり、ありがとうございます!


2020年7月10日金曜日

tropical paradise (My Creative Scrapbook DT Work)


Hi again! I have a lot of layouts to post recently, thanks to the design teams! Today I made a monochromatic (kind of) layout with the My Creative Scrapbook Limited Edition Kit.

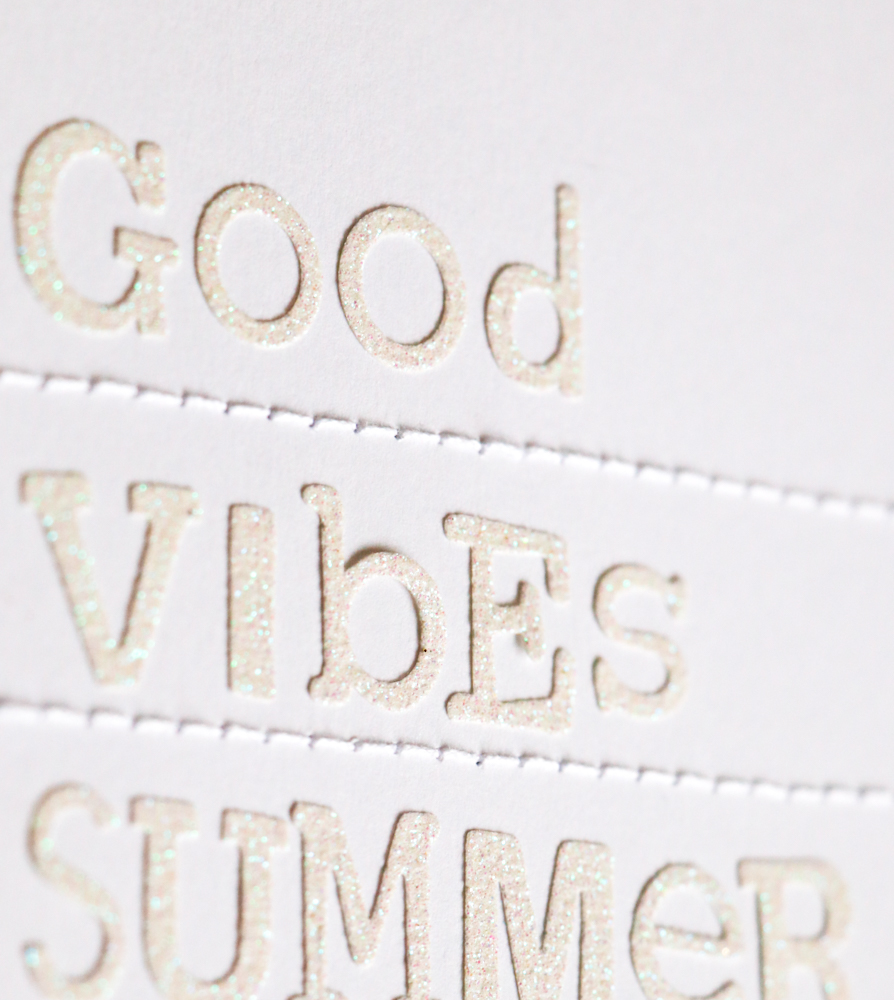
I used white cardstock for the background. I realized that I haven't used any of the alphas that come with the kit yet, so I created words with them and lined them vertically. I carefully hand stitched the lines with white thread. I lightly drew the lines with my pencil and used my sewing machine to punch the holes. Then before stitching, I erased the lines. In this way you can stitch straight and neatly without leaving pencil lines. After I finished that, all I did was gather the seashells that were fairly white,
 and added the title. Simple and clean! Here are the close-ups;

またまたこんにちは!DTのおかげで、このところ投稿できるレイアウトがたくさん!今日は、My Creative Scrapbook のLEキットを使って、単色レイアウトにトライ。

背景には白のカードストックを選びました。キットに入っているアルファベットステッカーをまだ使ってないのに気づいたので、それで言葉をたくさん作り、縦に並べました。間を手縫いしたのですが、まず鉛筆で薄く線を引き、ミシンで穴を空けます。手縫いする前に鉛筆の線を消せば真っすぐできれいな線を縫うことができます。それが終われば後は白っぽい貝殻を集め、タイトルを加えれば完成!簡単キレイ!クローズアップです♪


I really like how this turned out! I know every scrapper has tons of alpha stickers, and if you do this tone on tone background with them, it won't get too busy. 

このレイアウトかなり気に入りました!皆さんもアルファベットステッカーたくさん余ってませんか?背景と同色のアルファベットを使えば、ごちゃごちゃせずすっきりします!


You can get more information about this and the other kits at My Creative Scrapbook and you can find tons of inspiration in the blog too!

Thank you for visiting,  and have a scrappy day!

このキットと、その他のキットは My Creative Scrapbook で買えますよ~。ブログもどうぞ!
訪問して下さり、ありがとうございます!


2020年7月9日木曜日

tropical paradise (My Creative Scrapbook DT Work)


Hi scrappy friends! This is my third layout made with the My Creative Scrapbook Limited Edition Kit. 

I used a cutfile and I wanted to back some of the flowers, so I pulled out some cardstock and randomly painted it with yellow, orange and pink watercolors. Then I traced the outlines of the flowers and backed the cutfile. I love the soft gradation of the three colors. Before I layered the cutfile, I spread some white gesso on the place where the photo and embellishements were going to be placed. I fussy cut some flowers and used them as embellishments along with diecuts, prima flowers, chipboard and a butterfly. I splattered white acrylic paint and finished the layout. Here are the close-ups;

スクラッパーの皆さんこんにちは!今日は My Creative Scrapbook のLEキットで作成した3枚目のレイアウトを紹介します。

今回はカットファイルを使用。お花に少し色を足したかったので、白のカードストックにイエロー、オレンジ、ピンクの水彩絵の具で着色し、お花の形にカットして貼り付けました。やわらかいグラデーションがいい感じ!カットファイルを貼り付ける前に、写真とエンベリが来る箇所にジェッソを塗りました。お花をいくつかカットアウトし、ダイカットやお花、チップボードとともに飾りつけ。最後に白のアクリル絵の具を全体に散らして完成!クローズアップです♪


You can get more information about this and the other kits at My Creative Scrapbook and you can find tons of inspiration in the blog too!

Thank you for visiting,  and have a scrappy day!

このキットと、その他のキットは My Creative Scrapbook で買えますよ~。ブログもどうぞ!
訪問して下さり、ありがとうございます!


2020年7月8日水曜日

RELAX Unwind ENJOY (My Creative Scrapbook DT Work)


Hi again! My second layout for My Creative Scrapbook is this one! 

There was a paper with beautiful soft stripes so I cut some of them, glued them to white cardstock and stitched the edges.

またまたこんにちは!My Creative Scrapbook 2枚目のレイアウトです。

やわらかい色合いのストライプのパターンペーパーがあったので、それを何本かカットして白のカードストックに貼り、淵にミシンをかけました。


I painted the part where I wanted to put the photo with soft watercolors and stamped over it. There is a sheet of stamps that come with the kit, and you can use it in many ways! I layered the photo with scraps of paper and embellished around it with diecuts and chipboard.

写真を貼りたい位置に水彩絵の具で着色し、上からスタンプしました。キットにスタンプが1シートついてくるのですが、色々な使い方ができそうです!写真に余りペーパーを重ね、周りをダイカットやチップボードで飾りつけ。


I added some black splatters.

黒のアクリル絵の具を散らして完成。


You can get more information about this and the other kits at My Creative Scrapbook and you can find tons of inspiration in the blog too!

Thank you for visiting,  and have a scrappy day!

このキットと、その他のキットは My Creative Scrapbook で買えますよ~。ブログもどうぞ!
訪問して下さり、ありがとうございます!