2018年3月17日土曜日

Everyday moments (Scrap Our Stash DT Work)


Hi friends! This is my take on the new Blend - A - Sketch challenge from Scrap Our Stash! Here are the sketches, and don't forget to add a FRAME!
 
皆さんこんにちは!今日は、Scrap Our Stash のチャレンジで作ったDTレイアウトを紹介します。こちらがスケッチで、この二つを組み合わせてレイアウトを作ってね。それに、フレームを加えることが条件です。
 
I used the big frame and bike from the left sketch, and all the other details from the right sketch. I used watercolor paper for the background, and painted with several colors (purple, green and yellow)that match with the papers. I cut out a big piece of patterned paper like a frame and layered it on the background with a strip of paper. I matted the picture with green paper and layered several frames underneath. I used puffy stickers and diecuts for decoration and popped up the title with foam. Here are some close-ups;

左のスケッチからは大きなフレームと自転車、右のスケッチからはその他の部分を使いました。台紙には水彩用のペーパーを使って、パターンペーパーに合う色(紫、緑、黄)の水彩絵の具で着色しました。パターンペーパーをフレームのようにカットし、ボーダーと一緒に配置して貼りつけました。写真は緑のペーパーでマットし、フレームを数種類重ねました。エンベリとしてぷっくりステッカーやダイカットを使い、タイトルはフォームでポップアップ。


I like the Spring atmosphere of this layout. I hope you liked it too and thank you for visiting! Can't wait to see your take on the challenge!

春らしい雰囲気がお気に入りの一枚になりました。何かのヒントになれば嬉しいです♪ 訪問して下さり、ありがとうございました。
 
Instagram URL http://instagram.com/natsukoslittlecraftroom

Natsuko xxx

2018年3月15日木曜日

Delightful memory (CSI CASE FIE #250 DT Work)


Hello! Today I'm excited to share my DT layout for CSI ! Here is the case file. I used the color palette, paint, puffy stickers and twine.
 
こんにちは。今日は、CSI のDTワークを紹介します。こちらがチャレンジ。私は、色と絵の具、ステッカー、トワインを使いました。詳しいチャレンジの内容はブログをチェックしてね♪

I used dark kraft paper and light blue patterned paper for the background. After spreading white gesso, I painted over it with light blue watercolor and added some splashes with light brown watercolor. I tied red twine to divide the two papers and I think it turned out pretty nice!  I layered the picture with several papers and decorated around it with fussy cut arrows, words, a camera and the title. I popped some up with foam. I also used a transparant tag and puffy stickers. Here are the close-ups;

濃いクラフトペーパーと水色のパターンペーパーを使いました。ジェッソを塗って乾かしてから、水色の水彩絵の具で着色し、薄い茶色の水彩絵の具を飛ばしました。2色の間に赤のトワインを巻きつけたのですが、これがなかなかいい感じ!写真に数枚のペーパーを重ね、カットアウトした矢印、英字、カメラ、タイトルを飾りつけました。いくつかはポップアップしています。トランスパレンシーのタグと、ぷっくりステッカーも使いました。


I love how ths turned out! I hope you will enjoy scrapping too with this awesome challenge! Thank you for visiting and see you in the next layout!

シンプルだけどなかなかのお気に入りになりました。皆さんもこのチャレンジ、是非楽しんでね♪ 訪問して下さり、ありがとうございました。

Instagram URL http://instagram.com/natsukoslittlecraftroom

Natsuko xxx


I ♡ YOU (Let's Get Sketchy DT Work)


Hi scrappy friends! I'm happy to share my new layout for Let's Get Sketchy:) Here is the sketch!
 
こんにちは!今日のレイアウトは、Let's Get Sketchy のDTワークです。こちらがスケッチ。
 
 
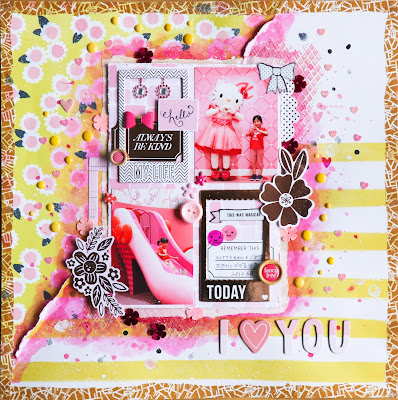
These are pictures of my daughter with Hello Kitty in Universal Studio Japan. She was a little surprised at the size of kitty..lol.
 
ユニバでキティちゃんと撮った写真を使いました。娘はキティちゃんの大きさにびっくり(笑)
 
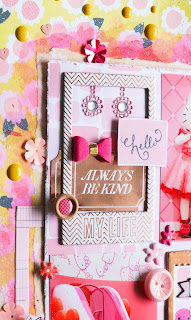
I started with combining 2 patterned papers and adhered them. Then I lifted up the edges of the flower paper to add some interest. I spread some pink textured paint on a stencil, and created patterns on the right upper and left lower part of the layout. I adhered 2 pictures and 2 frames on one paper, and decorated with diecuts, puffy stickers, buttons, rhinestones and a ribbon. I tore some washi tape and placed them under the paper like a frame. I adhered the paper with foam and added dimention. I used watercolor and a brush to paint around the picture. After it had dried, I flicked some white acrylic paint with a toothbrush, dabbed some black acrylic paint and scattered heart and flower shaped sequins. I also added some yellow enamel dots. With so many things going on in the layout, I thought it might be too much, but I'm satisfied with the results. Kitty's house was so pink and glittery anyway:) Here are some close-ups;
 
まず、パターンペーパー2種類を組み合わせて貼りつけ、花柄ペーパーの端を少し折り曲げて立体感を出しました。次に、ステンシルとテクスチャペイントを使って、右上と左下に模様をつけました。写真2枚とフレーム2つをペーパーに貼りつけ、ダイカットやステッカー、ボタン、ラインストーン、リボンで飾りつけ。マステをフレームのようにペーパーの周りに貼りつけ、ペーパーをフォームでポップアップしました。水彩絵の具で着色して乾かしてから、白いアクリル絵の具を歯ブラシを使って飛ばし、黒いアクリル絵の具もちょんちょん。花とハートのスパンコールを散りばめ、黄色のエナメルドッツを貼りつけて完成。色々やりすぎてしまったかなーと思いながら、キティちゃんのおうちもかなりピンクでキラキラだったしいっか(笑)


Thank you for stopping by, and I hope you have a nice scrappy weekend!
 
訪問して下さり、ありがとうございました。良い週末を!!
 
Instagram URL http://instagram.com/natsukoslittlecraftroom

Natsuko xxx


2018年3月3日土曜日

happy GO lucky (Scrap Our Stash DT Work)

 
Hi! I'm happy to share my layout for the March Scrap Our Stash Golden Globe stash challenge! Here is the Challenge. The theme is 'happy' or 'lucky' and you have to add an emoji embellishment and/or patterned paper.

こんにちは!今日のレイアウトは Scrap Our Stash の3月のチャレンジで作りました♪ こちらがチャレンジ。テーマは「ハッピー」または「ラッキー」で、絵文字のペーパーかエンベリを使うこと。

 
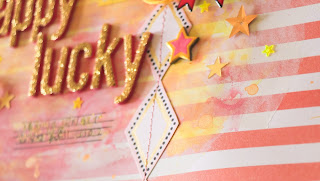
For mine I decided to use a Happy Photo! Since I didn't have any emoji paper or embellishment, I decided to make my own. I painted with yellow watercolor on white cardstock, punched some circles and drew faces:) I also added some gold on the edges of the circle so they will blend in with the background. Before I adhered anything, I spread some white gesso on the background and added some yellow, gold and pink paint. Then I fussy cut two strips of diamond-shaped borders and machine stitched them in the middle. I made a lot of circles with yellow string and placed them around the picture with the emoji embellies, stickers, stars and cut-out words. I added photo corners on the corners of the layout and scattered tiny bits of yellow stars. Here are the close-ups;
 
私はハッピーな写真を使うことにしました。絵文字のペーパーもエンベリもなかったので、自分で作ることに♪ 白いカードストックを黄色の水彩絵の具で着色、丸パンチで抜いて顔を描くというシンプルなもの(笑) 背景と馴染むように、ゴールドで淵を塗りました。背景はジェッソを塗って黄色、ゴールド、ピンクの絵の具で着色しました。次にダイヤ柄のボーダーを2本、カットアウトし、貼りつけてから真ん中をミシンで縫いました。写真の周りに、黄色の紐をぐるぐるして作った丸と、絵文字、ステッカー、星、切り抜いた英字を飾りました。レイアウトの四隅にフォトコーナーをつけ、小さな黄色い☆を散りばめて完成!


Making my own emoji embellies was really fun! It made me remind of school :) I'm looking forward to seeing everyone's layouts and I hope you all have fun creating!! Thank you so much for stopping by and have a nice weekend!
 
自分で絵文字エンベリを作るのはなかなか楽しかったです!学校の図工の時間を思い出したりして(笑) 皆さんがどんなレイアウトを作るのか、見るのを楽しみにしています。訪問して下さりありがとうございました。良い週末をお過ごしください♪
 
Instagram URL http://instagram.com/natsukoslittlecraftroom

Natsuko xxx


2018年3月1日木曜日

TOMBOY (CSI CASE FILE #249 DT Work)


Hello friends! Today I'm excited to share my layout for the new CASE FILE from CSI! Here is the case file. I was inspired by the bunting, colors and the outdoor theme. My daughter was such a tomboy and loved playing outdoors!

こんにちは!今日は、CSI の新しいチャレンジで作ったレイアウトを紹介します♪ こちらがチャレンジです。私は、バナーと色とアウトドアのテーマにインスピレーションをもらって作りました。娘は小さい頃、本当にお転婆で、外遊びが大好きでした!

 
I decided to fussy cut some signs from paper, and line them up on a map patterned paper. Before I adhered them, I spread gesso and sprayed some green and crimson ink although it doesn't show much. After I adhered all the signs, I matted the photo with patterned paper and embellished around them with stickers, metal parts, a wooden flair and enamel dots. I finished the layout with adding some black splatters. Here are some details;
 
まず、ペーパーから標識をカットアウトし、地図のパターンペーパーにバナーのように並べてみることにしました。貼りつける前に、ジェッソを塗り、緑と真紅色のインクをスプレーしましたが、写真ではあまり見えないですね、ごめんなさい!標識を貼りつけて、写真にペーパーを重ねた後は、ステッカーやメタルパーツ、木のボタン、エナメルドッツで飾りつけました。最後に黒い点をちょんちょんとのせて完成!


The process was very simple, but I love how it turned out! You can find tons of inspirations from the design team, so don't forget to check the CSI blog! Thank you for stopping by, and have a nice day:)

とても簡単なプロセスでできましたが、出来上がりには満足!デザインチームの作品は素敵なものばかりなので、CSIのブログも是非チェックしてね♪ 立ち寄って下さり、ありがとうございました!良い一日を♡

Instagram URL http://instagram.com/natsukoslittlecraftroom

Natsuko xxx

HAPPY (Let's Get Sketchy DT Work)

 
Hi Scrappers! The new sketch from Let's Get Sketchy is revealed so I hope you're ready to get creative! Here is the awesome sketch:

スクラッパーの皆さん、こんにちは! Let's Get Sketchy の新しいスケッチが発表されました。準備はいいですか??こちらがスケッチです♪

 
I painted the background with pink and green watercolors and added some splatters. I cut out strips of paper in different colors and machine stitched the middle of them. I slided a picture of my daughter in a photo frame and adhered it in the center. I fussy cut some flowers and overlapped one of them on the frame. I love the puffy stickers I used (stars, ribbon, title and words) and also the soft-colored button. Here are the close-ups;
 
まず、背景をピンクとグリーンの水彩絵の具で着色し、同じ色を周りに飛ばしました。色んな色のペーパーをカットして並べ、それぞれ真ん中をミシンで縫いました。フレームに入れた娘の写真を真ん中に配置、貼りつけました。お花をいくつかカットアウトし、一つはフレームに重ねて貼っています。他に、星、リボン、タイトル、英字のステッカーやボタンで飾りつけて完成。


I hope you will join this challenge!! Thank you for stopping by:)
 
皆さんのご参加、お待ちしています。訪問して下さり、ありがとうございました。


Natsuko xxx


kids=COOL (White...with 1 DT work)


Hello! This is my take for the March Challenge of White...with 1. The color for this month is CRISPY LETTUCE and we have a moodboard to go with it. I took inspiration from the frog:) It reminded me of this silly picture of my daughter dressed as a frog.

こんにちは!今日のレイアウトはWhite...with 1 3月のDTワークです。今月の色はレタスグリーン。ムードボードもあるので、ヒントにしてみて下さいね♪ 私はカエルを見て、娘がカエルのかぶりものをしてはしゃいでいるこの写真を思い出しました(^○^)


I made random circles with different shades of green. Then I stitched around some circles with black thread, but it was sooooo crooked and too ugly so I used a black crayon to circle over the stitches...LOL. I stamped, used epoxy stickers and a ribbon and splattered some black paint. I stitched around the layout twice with green thread (this time it turned out fine) and finished the layout. Simple but fun! Here are some close-ups;
 
数種類のグリーンを使って丸を描きました。その後いくつかの周りをミシンで縫ってみたのですが…あまりにも不細工だったので、上からクレヨンでぐるぐるしました(笑) 丸をスタンプやステッカー、リボンなどで飾り、黒の絵の具を散らしました。レイアウトの淵を2週、ミシンで縫って(これは上手くいきました♪)完成!シンプルだけど楽しかったです。


Hope you will join us! Can't wait to see your layouts!! Thank you for stopping by, and I hope you have a nice weekend!
 
皆さんも是非、参加してみて下さいね!お待ちしております。訪問して下さり、ありがとうございました。
 
Instagram URL http://instagram.com/natsukoslittlecraftroom

Natsuko xxx